Guangzhou New Voyage Tech Co., Ltd.


-
-
High Intensity Obstruction Light
High Intensity Obstruction Light high intensity obstacle lights, HV transmission tower obstruction lights, solar obstruction lights High-intensity obstacle lights are used to indicate the presence of towers and high-rise buildings etc. with height above the level of the surrounding ground exceeding 150m. More
-
Medium Intensity Obstruction Light
Medium Intensity Obstruction Light medium intensity aviation lights, medium intensity aircraft warning lights, tower obstruction lights Medium-intensity obstacle lights, Types A and C, should be used alone, whereas medium-intensity obstacle lights, Type B, should be used either alone or in combination with low-intensity obstacle lights, Type B. More
-
Low Intensity Obstruction Light
Low Intensity Obstruction Light L810 obstruction light, red fixed obstruction light, tower crane warning light Low-intensity obstacle lights, Type A or B, should be used where the object is a less extensive one and its height above the surrounding ground is less than 45 m. More
-
Aircraft Warning Sphere aircraft warning balls, transmission line warning spheres Aircraft warning spheres are typically installed on power lines span long distances crossing deep valleys, lakes and rivers etc., in area of approaches to airports and aerodromes. More

-
Obstacle Light Controller obstruction lights control panel, control system for aircraft warning lights New Voyage Tech provides customized controlling solutions for hig-rise buildings with BMS, telecom towers and chimney etc. Enable users to control and monitor operation status of the obstruction lights. More
-
-
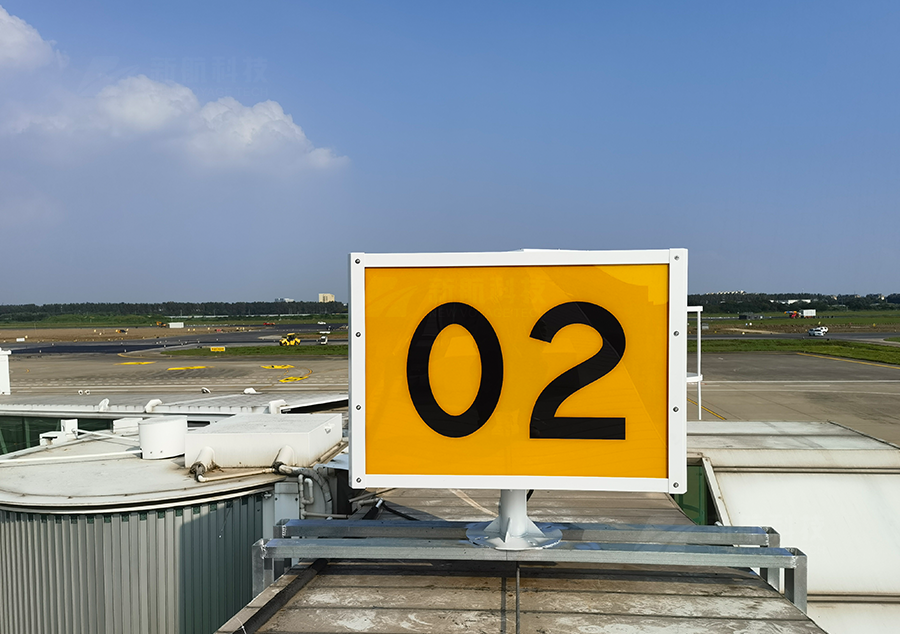
Airfield Guidance Sign direction signs, information signs, location signs, mandatory instruction signs, runway/taxiway sign Airport sign systems provide visual cues to pilots and vehicle operators that enhance safe and efficient movement within the airfield environment. Elevated signs protect aeronautical surfaces and convey ground navigation information that enhances situational awareness when maneuvering on the airfield. More
-
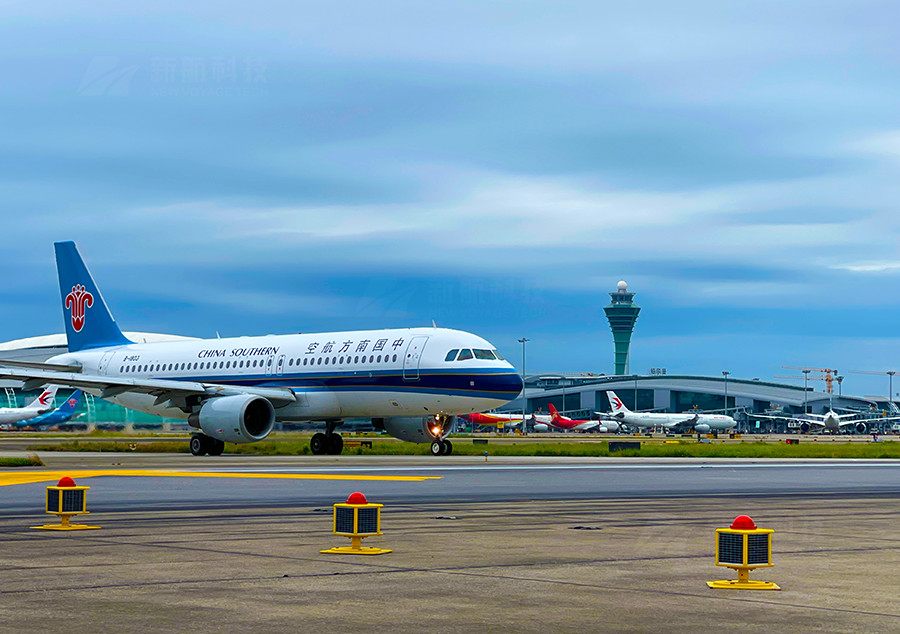
Unserviceability Light solar unserviceable area light, >10cd, red fixed, omidirectional light. Red fixed light for marking unserviceable area temporarily. A minimum of four such lights should be used, except where the area is triangular in shape where a minimum of three lights may be employed. Unserviceable area lights should be frangible. More
-
Meteorological visibility Light
-
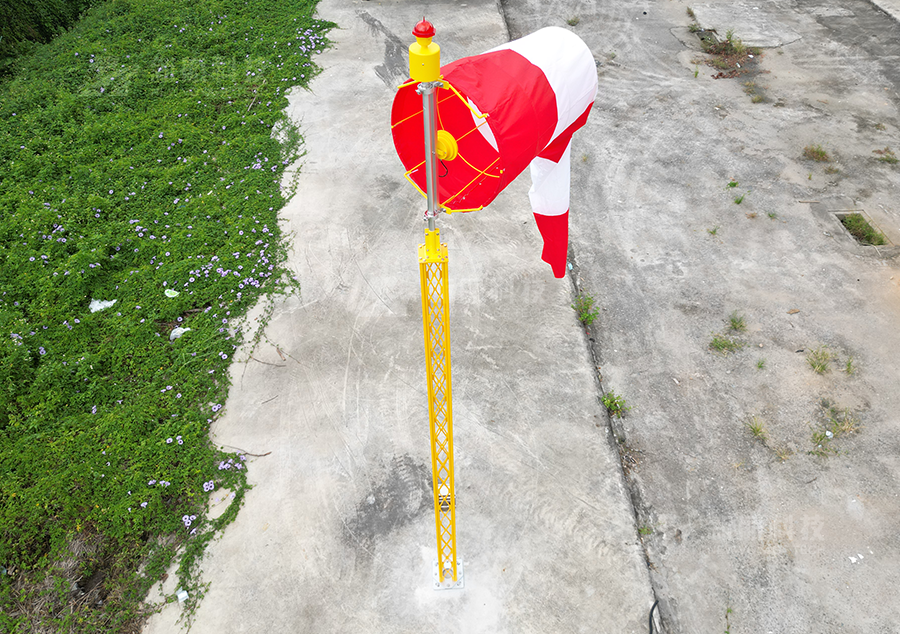
Wind Cone airport wind cone, frangible wind cone, rigid wind cone, internally lighted wind sock, wind vane Wind cones are used at airports to gives a clear indication of the direction of the wind and a general indication of the wind speed. Available in Type L806, Type L807 and Type L808. More
-
-
Taxiway Retroreflective Marker
Taxiway Retroreflective Marker retro reflective taxiway edgemarker, taxiway edge markings, airport retroflective marker Marking the edge of the taxiways, runways, ends and threshold. More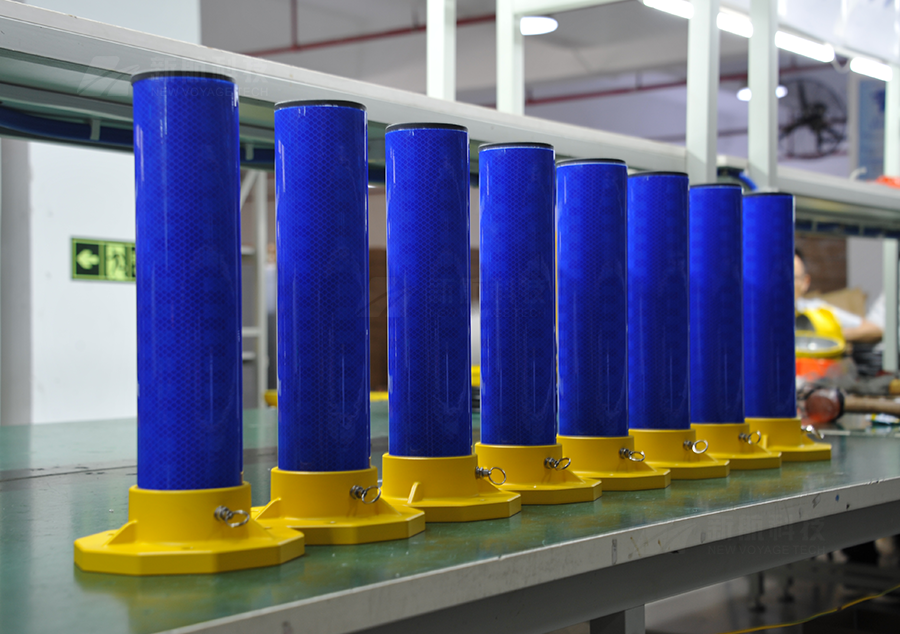
-
-
Touchdown and Lift-off Area Light
Touchdown and Lift-off Area Light TLOF perimeter light, heliport TLOF light, helipad TLOF light, TLOF inset light, TLOF elevated light Inset / elevated green fixed omidirectional light, to provide lighting for the touchdown and take-off area, enable the pilot to distinguish the touchdown and take-off area and its essential elements during the final approach. More -
Aiming Point Light LED aiming point light of heliport, white, omnidirectional, 100cd Aiming point lights shall form a pattern of at least six omnidirectional white lights. The lights shall be inset when a light extending above the surface could endanger helicopter operations. More
-
Final Approach and Take Off Area Light
Final Approach and Take Off Area Light FATO perimeter light, FATO light of heliport, withe omnidirectional light, 100cd Use of minimum of four flush or raised light fixtures per side of a square or rectanular FATO. Space lights at intervals of not more than 50m. To define a circular FATO, use a minimum of ten lights at intervals of not more than 5m. More -
Heliport Beacon heliport indentification beason, white light, 2500cd A heliport beacon should be provided ata heliport where long-range visual guidance is considered necessary and is not provided by other visual means; or identification of the heliport is difficult due to surrounding lights. More
-
Heliport Wind Cone lighted wind cone, wind direction indicator, heliport wind vane A heliport should be equipped with at least one wind cone that gives a clear indication of the direction of the wind and a general indication of the wind speed. The wind cone must be placed outside the safety zone and away from flight paths. More
-
Flight Path Alignment Guidance Light
Flight Path Alignment Guidance Light indicates the avialable approach and/or departure path direction Consists of a row of three or more lights spaced uniformly a total minimum distance of 6.2m. Intervals between lights should not be less than 1.5m and should not exceed 3m. Where space permits, there should be five lights. The lights should be steady onnidirectional insent white lights. More -
Taxiway Edge Light at least 2cd from 0° to 6° vertical, and 0.2 cd at any vertical angles between 6° and 75° Taxiway edge lights shall be fixed lights showing blue. The lights shall show up to at least 75° above the horizontal and at all angles in azimuth necessary to provide guidance to a pilot taxiing in either direction. More
-
Heliport Controller helipad control panel, heliport radio controller, heliport VHF controller Provide complete control of heliport lights. Lights control can be provided by low voltage DC or AC power. The output of the controller can be activated manually by switches, or automatically with the use of a photocell and/or VHF radio control. More
-
-
Heliport Lights helipad lights, heliport landing zone lights, heliport perimeter light We provide full range of heliport lights with control system suitable for surface level heliports and elevated heliports. These lights comply with ICAO and CAAC standards, contributing to the safety of landings or takeoffs. More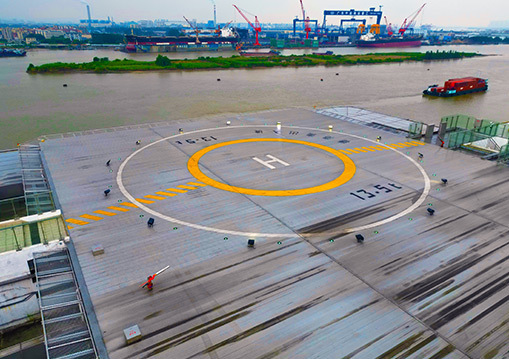
-
Airfield Lights Airport navigation lights are important facilities for ensuring the safe takeoff and landing of airc In the pitch-black night sky, they shine like stars, guiding airplanes to accurate taxiing and takeoff. These lights not only provide clear visual guidance for pilots, but also serve as a source of their confidence. In every corner of the airport, approach lights silently guard, ensuring the safety of aircraft. They are like guardians in the night sky, always sticking to their posts regardless of wind, rain, or thunder. In busy airports, approach lights play a vital role, ensuring the order and safety of flights, allowing every flight to take off safely. These are the airport approach lights, silently guarding our dreams of flight. More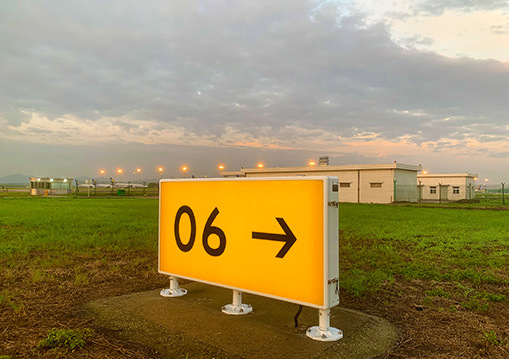
-
Aviation Obstruction Lights aircraft warning light, obstacle lights, aeronautical obstruction lights Typically installed on tall structures such as high-rise buildings, bridges, and towers. Its main function is to warn aircrafts to avoid collisions. These lights feature delivering high luminance at quite low power consumption. More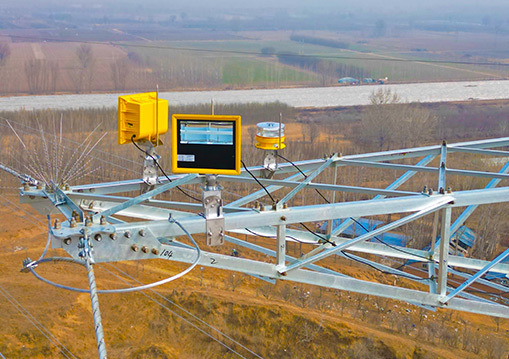
-
Expert DIY Installation Tips for Low Intensity Obstruction Lights: Enhance Safety with Ease
2026-09-17

Expert DIY Installation Tips for Low Intensity Obstruction Lights: Enhance Safety with Ease
Low intensity obstruction lights are crucial for ensuring safety in areas where aircraft or vehicles navigate near obstacles such as towers, tall buildings, and other structures. These lights provide vital warnings to both pilots and drivers, reducing the risk of accidents. Installing these lights yourself can save you time and money while ensuring they are placed correctly. In this guide, we will provide expert DIY installation tips for low intensity obstruction lights, covering everything from preparation to maintenance.
Table of Contents
- What Are Low Intensity Obstruction Lights?
- Importance of Low Intensity Obstruction Lights
- Pre-Installation Requirements
- Step-by-Step Installation Guide
- Testing and Maintaining Your Lights
- Common Installation Mistakes to Avoid
- Frequently Asked Questions
- Conclusion
What Are Low Intensity Obstruction Lights?
Low intensity obstruction lights are signaling devices designed to warn pilots and drivers of obstacles in their vicinity. Typically red or amber, these lights are installed on structures that exceed a certain height, helping to prevent accidents. They are essential for both aviation safety and traffic management, especially in urban areas where tall buildings or communication towers may pose risks.
Importance of Low Intensity Obstruction Lights
Understanding the importance of low intensity obstruction lights goes beyond compliance with regulations. These lights enhance safety by providing visual cues to pilots and drivers, helping them to navigate safely around obstructions. Their presence minimizes the chances of collisions and accidents, particularly during nighttime or adverse weather conditions when visibility is reduced. Moreover, they play a crucial role in regulatory compliance, adhering to the standards set forth by aviation authorities.
Pre-Installation Requirements
Understanding Regulations and Guidelines
Before diving into the installation process, it is crucial to familiarize yourself with the regulations and guidelines surrounding obstruction lights. Different regions may have specific requirements regarding the height at which these lights must be installed and their brightness levels. Consult your local aviation authority to ensure compliance and avoid legal issues.
Gathering Necessary Permits
In certain jurisdictions, you may need to obtain permits before installing obstruction lights. It is advisable to check local regulations to determine if permits are necessary. This step is vital to ensure your installation is legal and compliant.
Step-by-Step Installation Guide
Gathering Tools and Materials
Before beginning your installation, ensure you have all the required tools and materials. Here’s a list of essentials:
- Low intensity obstruction lights
- Mounting brackets
- Cable and connectors
- Drill and drill bits
- Screwdriver
- Wrench
- Safety gear (gloves, goggles, and hard hat)
Choosing the Right Location
The success of your installation hinges on selecting the appropriate location for the lights. Consider the following factors:
- **Height of the Structure**: Ensure that the light is visible from all directions and at a distance.
- **Surrounding Environment**: Avoid locations where trees or other structures might obstruct the light’s visibility.
- **Regulatory Compliance**: Follow guidelines regarding height and spacing from your local regulations.
Mounting the Light
Once you've identified the ideal location, it's time to mount the light. Follow these steps:
- **Prepare the Mounting Surface**: Ensure the surface is clean and free of debris.
- **Align the Mounting Bracket**: Position the bracket according to manufacturer instructions, typically at the top of the structure.
- **Secure the Bracket**: Use a drill to secure the bracket with screws, ensuring it is tightly fastened.
- **Attach the Light**: Follow the instructions to attach the light securely to the mounted bracket.
Connecting the Wiring
Wiring is a critical element of the installation process. Adhere to these guidelines:
- **Turn Off Power**: Before starting work, ensure that the power source is turned off to avoid electrical shock.
- **Run the Wiring**: Run the wiring from the power source to the light fixture, ensuring it is secured and protected from elements.
- **Connect Wires**: Use connectors to join the wires according to the manufacturer's instructions and electrical codes.
- **Test the Circuit**: Once all connections are made, turn the power back on and test the light to ensure it operates correctly.
Testing and Maintaining Your Lights
After installation, thorough testing is essential. Here’s how to ensure your obstruction lights are functioning correctly:
- **Visual Inspection**: Regularly check for any physical damage or wear to the light and mounting equipment.
- **Functionality Test**: Periodically test the lights during different conditions to confirm optimal visibility.
- **Maintenance Schedule**: Create a maintenance schedule to clean the lights and check electrical connections, thereby prolonging their lifespan.
Common Installation Mistakes to Avoid
While the installation process may seem straightforward, there are common pitfalls to watch out for:
- Ignoring Local Regulations: Always check for specific requirements to avoid fines or reinstallation.
- Improper Mounting Height: Ensure the lights are mounted at the correct height for optimal visibility.
- Neglecting Safety Precautions: Always wear appropriate safety gear and take necessary precautions when working at heights.
Frequently Asked Questions
1. How high should low intensity obstruction lights be installed?
Typically, these lights should be installed at least 200 feet above ground level or according to local regulations for specific structures.
2. Are low intensity obstruction lights energy-efficient?
Yes, many low intensity obstruction lights use LED technology, which is energy-efficient and has a long lifespan.
3. Can I install these lights myself?
Yes, with proper tools and knowledge of local regulations, you can perform a DIY installation. Follow the steps provided in this guide.
4. What maintenance do low intensity obstruction lights require?
Regular maintenance includes visual inspections, cleaning to remove debris, and testing to ensure they are functioning correctly.
5. How do I know if my lights are working properly?
Perform periodic functionality tests and inspections to ensure that the lights are clearly visible and operational.
Conclusion
Installing low intensity obstruction lights is a crucial step in ensuring safety for both air and ground navigation. With the right preparation, tools, and adherence to regulations, you can confidently complete a DIY installation. By following the detailed steps and tips provided in this guide, you can enhance the visibility of obstructions, helping to prevent accidents and maintain safety in your area. Stay safe and ensure your installation is performed correctly for the best results!
Previous:


COPYRIGHT 2025 Guangzhou New Voyage Tech Co., Ltd.
Powered by 300.cn Privacy Policy City branch BusinessCard
Website product specifications and parameters are updated irregularly without further notice. Please contact our staff for the latest project product information.